
[Published: August 13, 2026 | Last updated: August 13, 2026] | 9 min read
TL;DR
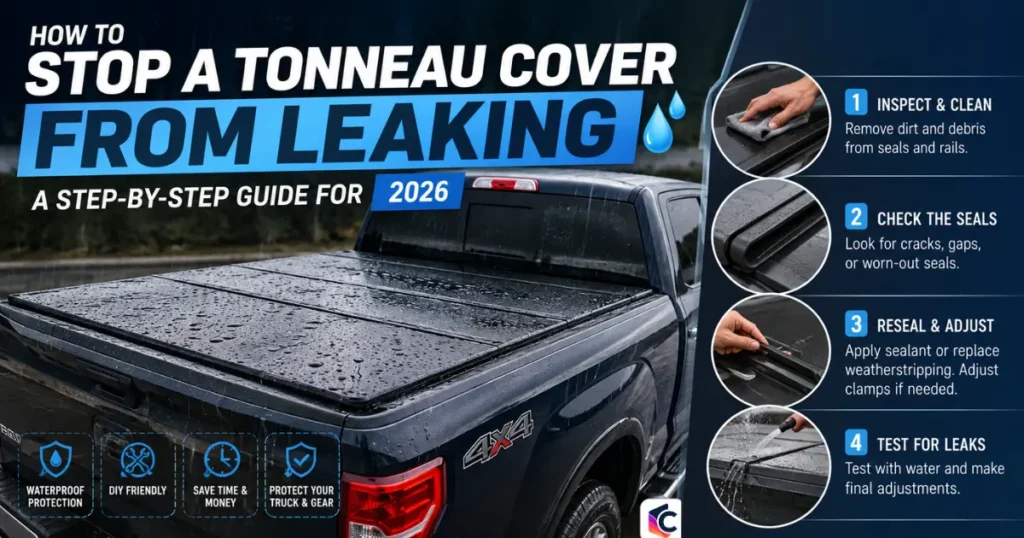
- Most tonneau cover leaks come from four sources: worn seals, loose or misaligned clamps, clogged drain tubes, or a gap at the tailgate.
- No tonneau cover is fully waterproof – manufacturers build them to manage water, not eliminate it (Truck Bed Cover Guide, 2026).
- Start by finding the exact wet spot (bulkhead, side rail, corner, tailgate, or hinge) before you touch any hardware (LAX Parts, 2026).
- Clamps should be torqued evenly, not just tight – over-tightening can warp the bed rail caps and create new gaps (Teamz Auto, 2026).
- If seals and alignment don’t fix it, check the drain tubes next – clogged tubes are one of the most common causes of pooling water (Tonneau Trend, 2026).
What You Need Before You Start
- Mild soap and water (for cleaning seals and rails)
- A soft cloth or sponge
- A torque wrench or a standard wrench/screwdriver set
- Silicone-based sealant rated for outdoor/automotive use
- A garden hose or a bottle of water for leak testing
- Your tonneau cover’s installation manual, if you still have it
Step 1: Find the Exact Point Where Water Is Getting In
Don’t start replacing parts yet. Open the cover after a rain or run a hose over it, and check the bed in sections: bulkhead, side rails, corners, tailgate, and hinges <cite index=”16-1″>since a leak can trace back to worn seals, loose rails, blocked drain paths, tailgate gaps, or poor alignment</cite>.
Mark the first wet spot you find. That’s almost always the source – water rarely travels far once it’s inside a closed cover.
Step 2: Clean and Inspect the Seals
The rubber seal running around the cover’s perimeter is the main water barrier. <cite index=”15-1″>These seals sit under constant compression, and over time – especially through temperature swings – they lose elasticity, leaving gaps where water gets through</cite>. UV exposure speeds this up: <cite index=”15-1″>rubber that’s spent two summers in direct sun performs differently from fresh material</cite>.
Wipe the full perimeter with mild soap and water, then run your fingers along it. Feel for hard, brittle, or flattened sections. If the seal has pulled away from the frame or cracked, replace it – cleaning won’t fix damaged rubber.
Step 3: Check and Re-Torque the Clamps
Loose clamps are one of the easiest fixes and one of the most common causes of leaks. Vibration from regular driving works clamps loose over months, especially on rough roads.
Tighten each clamp evenly around the perimeter rather than cranking down on one side. <cite index=”11-1″>Over-tightening doesn’t improve the seal – it can warp the truck’s plastic bed caps and create waves that let water in instead</cite>. If you have a torque wrench, <cite index=”11-1″>a common target is 10 to 12 ft-lbs, though you should check your cover’s manual for the exact spec</cite>.
Step 4: Realign the Cover on the Bed Rails
A cover that isn’t sitting flush creates gaps even if every seal is in perfect condition. Loosen the mounting hardware, re-center the cover, and check that the tension is even on both sides before retightening.
<cite index=”14-1″>A slight angle on the bed rails, combined with properly aligned seals, helps water drain instead of pooling on the cover</cite>. If one corner sits higher than the other, that’s usually where leaks start.
Step 5: Clear the Drain Tubes
If your cover is a hard folding, retractable, or hinged model, it likely has built-in drainage. <cite index=”15-1″>These channels collect water at the seal joints and route it out through drain tubes at the corners of the bed frame</cite>. <cite index=”15-1″>Leaves, dirt, pollen, and road debris are the usual culprits when these tubes clog</cite>, and <cite index=”15-1″>trucks parked under trees clog faster than ones kept in a garage</cite>.
Locate the drain tube openings near each corner of the frame. Disconnect them and flush with water, using a pipe cleaner or compressed air on stubborn clogs. <cite index=”13-1″>Make sure the tubes route water outside the bed rather than into an enclosed space – some installations mistakenly terminate inside the rail channel instead of outside it</cite>.
To test the system, <cite index=”11-1″>pour a bottle of water directly into the side tracks and watch how quickly it exits through the drain tubes – if it lingers or overflows, you have a clog or a slope problem</cite>.
Step 6: Seal Remaining Gaps and Check the Tailgate
Once seals, clamps, alignment, and drains are handled, apply a thin bead of automotive-grade silicone sealant to any remaining gap at the seams or corners. Let it cure fully before testing.
Don’t overlook the tailgate itself. <cite index=”11-1″>Truck manufacturers build tailgates with wide tolerances, leaving gaps along the sides and bottom that no cover seal can fully close</cite>. A tailgate seal, installed separately from the tonneau cover, closes that last gap.
Common Problems and How to Fix Them
| Problem | Likely Cause | Solution |
|---|---|---|
| Water pools in the bed after rain | Clogged drain tubes | Disconnect and flush tubes; confirm they exit outside the bed |
| Steady drip along the side rail | Worn or hardened seal | Clean seal; replace if cracked or flattened |
| Leak appears only after washing the truck | Loose clamps or misalignment | Re-torque clamps evenly; re-center the cover on the rails |
| Water enters near the tailgate | Factory tailgate gap | Install a separate tailgate seal |
| Leak at the hinge on a hard tri-fold cover | Hidden hinge drainage channel misdiagnosed as a rail leak | Check the internal hinge drain path before replacing the side rail seal |
Frequently Asked Questions
How do I stop my tonneau cover from leaking?
Find the exact wet spot first, then work through seals, clamps, alignment, and drain tubes in that order. Most leaks trace back to one of these four points, and fixing the wrong one first wastes time.
Are tonneau covers supposed to be 100% waterproof?
No. <cite index=”12-1″>Truck beds aren’t watertight from the factory, since manufacturers build in drainage gaps and tailgate seams – so some moisture intrusion is possible even with a cover installed</cite>. A properly functioning cover keeps cargo dry in normal rain and prevents standing water, but it manages water rather than blocking it completely.
Why does my tonneau cover only leak after a car wash?
High-pressure water finds gaps that light rain doesn’t. This usually points to loose clamps or a misaligned cover rather than a failed seal. Re-torque the clamps evenly and re-check alignment before assuming you need new seals.
What’s the difference between a rail leak and a hinge leak on a hard cover?
<cite index=”11-1″>On hard tri-fold covers, the hinges are the most common leak point, and this is frequently mistaken for a side rail leak</cite>. <cite index=”11-1″>A properly engineered hinge has a hidden drainage channel that routes water sideways into the rail tracks, so a leak near a hinge doesn’t always mean the hinge seal itself has failed</cite>.
How often should I check my tonneau cover’s drain tubes?
Check them at the start of each rainy season and after any period of heavy pollen, leaf fall, or off-road driving. <cite index=”15-1″>Trucks regularly parked under trees clog faster and need more frequent checks</cite>.
Summary
- Locate the exact wet spot before doing any repair work – don’t guess.
- Clean and inspect seals for cracking or flattening; replace rather than patch damaged rubber.
- Re-torque clamps evenly across the perimeter instead of over-tightening one side.
- Realign the cover on the rails so tension is even on both sides.
- Flush drain tubes at each corner and confirm they exit outside the bed.
- Add sealant or a tailgate seal only after the mechanical fixes are done, not as a first step.

Leave a Reply