
TL;DR
- To lower a drain cover, lift it out, remove or trim whatever holds it up (mortar bedding, riser rings, or a raised plastic collar), then refit it so the frame sits slightly below the surrounding paving.
- The job takes 1-3 hours for a standard yard drain, plus mortar curing time if you re-bed a frame.
- Paving Expert’s installation guidance says metal drainage fittings are normally set 3-6mm below the finished paving level.
- You need a spirit level, a straight edge, a cold chisel, a lump hammer, and mortar or sharp sand.
- If the drain connects to a public sewer, contact your water company before altering the chamber.
What Does It Mean to Lower a Drain Cover?
Lowering a drain cover means adjusting its frame or grate so the top sits level with, or just under, the surrounding surface. A raised cover is a trip hazard and blocks surface water from reaching the drain.
Covers end up too high for common reasons. New paving may have been laid at a lower level, a gully may have been replaced with a taller fitting, or the original bedding may have been set too thick.
A cover that stands proud of the paving also stops rainwater flowing in. As one Bunnings Workshop community reply notes, a cover at the same level as the pavers lets sitting water flow into the drain (Bunnings Workshop, community reply). That is the practical reason to fix it.
What Tools and Materials Do You Need?
You need basic masonry tools and a small amount of bedding material. Most of this is available at any builders’ merchant.
- A lifting key or heavy-duty screwdriver to open the cover
- A cold chisel and lump hammer to break out old mortar
- A spirit level and a straight edge long enough to span the cover
- A bucket trowel and a small mixing tub
- Mortar mix or a sharp sand and cement blend
- Gloves, eye protection, and a dust mask
Step 1: Identify What Is Holding the Cover Up
Start by working out what sits under the frame, because the fix depends on it. Lift the cover and look at the frame edge and the layers beneath.
You will usually find one of three set-ups:
- A cast iron or steel frame bedded on mortar
- A plastic gully or channel with a raised collar or riser ring
- A plastic grate resting in a fixed plastic body
Take a photo before you start. It helps when you reassemble and when you buy parts.
Step 2: Measure How Much You Need to Lower It
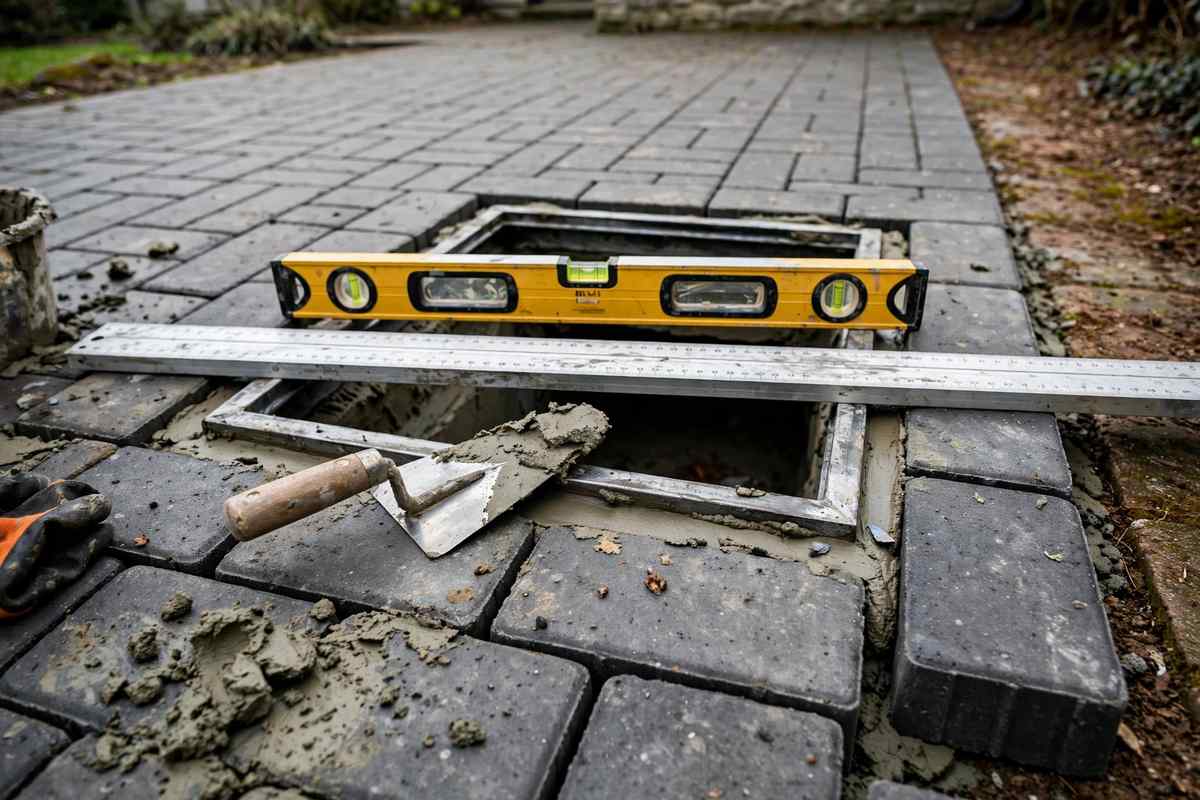
Lay a straight edge across the paving and over the cover, then measure the gap between the straight edge and the top of the frame. That gap is the amount you need to remove, plus the target clearance below paving level.
The target depends on the product. Paving Expert states it is standard practice to set ironwork 3-6mm below the finished paving level (Paving Expert, recess cover case study). One manufacturer’s guide for a specific cover system says the frame should sit 1-2mm lower than the planned paving level (CD 300SR installation guide, manufacturer). Check the instructions for your cover and use those figures if you have them.
Step 3: Remove the Frame or Trim the Riser
If the frame is bedded on mortar, break out the bedding and lift the frame. If a plastic riser or collar is raising the grate, you can often shorten it.
For a bedded metal frame:
- Chip around the frame edge with the cold chisel, working in small taps to avoid cracking nearby paving.
- Lever the frame out with the lifting key and a flat bar.
- Clear loose debris from the opening so nothing falls into the drain pipe.
For a plastic collar, mark the cut line at your measured height, then trim it with a fine-toothed saw or multi-tool. Do not cut cast iron or ductile iron frames. Those need re-bedding, not shortening.
Step 4: Re-Bed the Frame at the Correct Height
Re-bedding sets the frame at the new level on fresh mortar. Use less mortar than before, and check the height before it hardens.
Spread a thin bed of mortar on the seating ledge. Press the frame down, then rest your straight edge across the paving and over the frame. Tap the frame down until it sits at your target height below the straight edge.
A mybuilder.com tradesperson reply suggests laying the paving as close to the cover as possible, then bedding the cover and knocking it down to level using a straight edge across both sides (MyBuilder, community reply). Check level in two directions, because a frame that is flat in one direction can still tilt.
Step 5: Let the Mortar Cure and Test the Drain
Leave the mortar to cure according to the pack instructions, usually 24 hours before foot traffic and longer before vehicles. Then refit the cover and test drainage.
Pour a bucket of water near the cover. Water should run toward the drain and drop in without pooling around the frame. If water collects on one side, the frame is likely tilted or the paving falls the wrong way near the cover.
What Problems Can Come Up?
Most problems come down to height errors or an unstable bed. The table below lists the usual ones.
| Problem | Likely Cause | Solution |
|---|---|---|
| Cover still sits proud of paving | Mortar bed too thick | Lift the frame, remove some mortar, and re-bed |
| Cover rocks when stepped on | Voids under the frame | Lift and re-bed with a full mortar bed |
| Water pools beside the cover | Frame tilted or paving falls away | Re-level the frame; check paving falls |
| Plastic collar cracks when trimmed | Brittle or cold material | Warm the area and use a finer-toothed blade |
| Cover is too low and traps debris | Over-lowered frame | Raise slightly with a thin mortar layer |
When Should You Call a Professional?
Call a professional when the cover is cast iron over a shared sewer, when the frame is cracked, or when the surface carries vehicle traffic. These situations carry safety or legal implications.
Check the load rating marked on the cover before you reuse it. Light-duty covers can fail under a car, so a driveway needs a cover rated for vehicles. If the chamber connects to a public sewer, your water company may need to approve any changes.
Frequently Asked Questions About Lowering a Drain Cover
A drain cover should sit slightly below the paving, typically 3-6mm for metal frames according to Paving Expert’s case study. Some manufacturers specify 1-2mm, so check the guide for your cover. Slightly below paving level lets water flow in without creating a trip edge.
Sometimes. If a plastic riser or collar is raising the grate, you can often trim it in place or swap it for a shorter one. A bedded metal frame has to be lifted and re-bedded, because the mortar under it sets the height.
A standard yard drain cover takes 1-3 hours of active work. Mortar needs further time to cure, usually 24 hours before light foot traffic, and longer before vehicles.
Yes, for plastic collars and risers that are not load-bearing. Mark a clean line, use a fine-toothed saw, and smooth the edge. Do not cut cast iron or steel covers, and do not trim any cover rated for vehicle loads.
A raised cover is a trip hazard and stops surface water entering the drain. Rainwater can pool around it, which may lead to damp patches, algae, or frost damage on the surrounding paving.
Not for a private yard drain on your own property. If the chamber is part of a shared or public sewer, your water company may need to approve the work. Contact them before you start.
Key Takeaways
- Measure the height gap with a straight edge before you touch anything.
- Aim for a frame 1-6mm below paving, depending on the manufacturer’s instructions.
- Re-bed metal frames on fresh mortar and trim plastic collars.
- Test with a bucket of water after the mortar cures.
References
- Paving Expert, “Recess cover case study” – https://www.pavingexpert.com/recess03
- Clark Drain / Easy Merchant, “CD 300SR installation guide” – https://www.easymerchant.co.uk/wp-content/uploads/2024/02/CD-300SR-install-guide.pdf
- JD Pipes, “How to install a recessed drain cover” – https://www.jdpipes.co.uk/knowledge/manhole-covers/recessed-manhole-installation.html



Leave a Reply