
TL;DR
You can paint a sink drain with metal primer and a water-resistant enamel or epoxy spray paint, but the finish only lasts if you remove the drain first and sand it.
The job takes about 1 hour of work plus drying time, and the paint label sets the full cure time.
Never paint threads, gasket surfaces, or the underside of the drain flange, because paint there breaks the watertight seal.
Skip the primer and the paint will peel, since chrome and stainless steel are slick and non-porous.
A painted drain is a cosmetic fix. If the metal is pitted, cracked, or leaking, replace the drain.
What Does It Mean to Paint a Sink Drain?
Painting a sink drain means refinishing the visible metal parts, mainly the drain flange (also called the drain ring), with primer and metal paint to change or restore the color. People do it to match a new faucet, cover tarnish, or fix a worn oil-rubbed bronze finish without buying a new part.
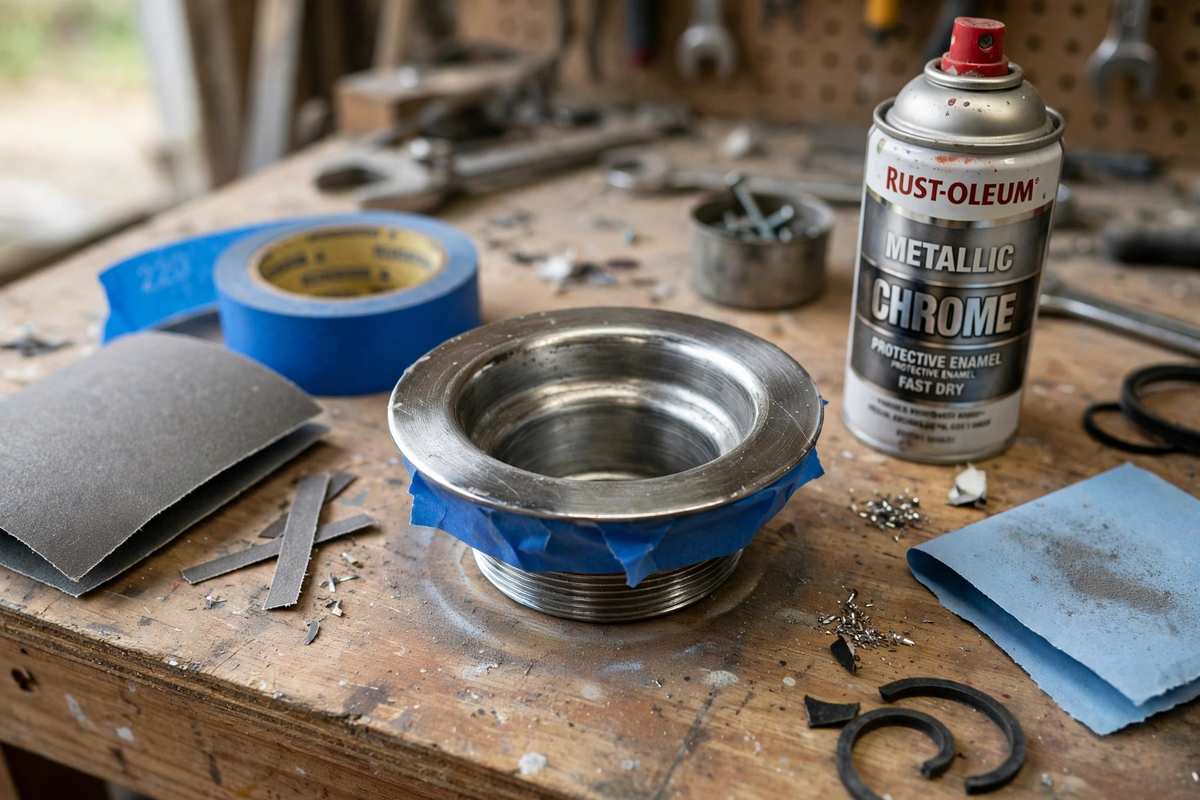
The drain flange is the ring you see at the bottom of the basin. The strainer or pop-up stopper sits inside it. These are the parts that get painted. The pipe fittings below the sink stay unpainted.
What You Need Before You Start
You need a screwdriver or pliers, fine sandpaper (220 grit), degreaser, painter’s tape, a drop cloth, metal primer, and a water-resistant enamel or epoxy spray paint rated for metal. Plumber’s putty is needed for reinstalling the drain.
Check the paint label before buying. Choose a product that lists metal surfaces and indoor use. Spray paint gives a more even coat than a brush on small curved parts. Open a window or work in a ventilated space, since spray paint fumes build up fast.
Step 1: Remove the Drain From the Sink
Remove the drain flange and stopper whenever you can. Painting a drain in place is possible, but it leaves tape lines and risks paint in the sink bowl. Loosen the nut under the sink, lift the drain out, and clean off the old putty.
If the drain will not come out, skip to the in-place method in the FAQ section below. Removal gives the best result because you can coat every visible surface and let the part dry flat.
Step 2: Clean and Degrease the Metal
Wipe the drain with a degreaser or rubbing alcohol until no soap film or residue is left. Paint will not stick to oils, so this step decides whether the finish holds. Let the part dry fully, since leftover solvent or water makes paint bubble.
Rinse and dry the part. Handle it by the edges afterward, because fingerprints leave oil behind.
Step 3: Sand the Surface Lightly
Sand the visible metal with 220-grit paper until the shine is gone. The goal is a dull, scuffed surface that gives primer something to grip, not bare metal everywhere. Chrome is the hardest finish to paint because it is slick, so sand it evenly.
Wipe off all the dust with a clean cloth before moving on.
Step 4: Mask Everything You Will Not Paint
Cover the threads, the underside of the flange, and any rubber gasket with painter’s tape. These areas must stay bare so the drain seals against the sink and the nut tightens correctly. Paint on a sealing surface can crack and let water seep through.
If you are painting the drain in place, tape off the sink surface around the flange and cover the bowl with plastic. One guide recommends taping a 2-inch-wide area from the flange edge outward, without letting the tape overlap the flange itself. (Hunker)
Step 5: Apply Metal Primer in Thin Coats
Spray one thin coat of metal primer from about 8 to 10 inches away and let it dry as the can directs. Chrome and stainless steel are non-porous, so primer is what makes the paint stick. Use a primer with rust inhibitors if the metal shows any corrosion.
Two thin coats beat one heavy coat, because thick primer runs and stays soft longer. Rotate the part between coats to reach every side.
Step 6: Spray the Paint
Apply the paint in two or three thin coats, waiting for each to dry before the next. Use a water-resistant enamel or epoxy formula made for metal. A Hometalk answer on a worn bronze drain also recommends thin, repeated coats and following each drying time. (Hometalk) For other drain types, see our guide on whether you can paint drain covers.
Spray in light sweeping passes and stop before the surface looks wet. Heavy coats drip and take much longer to cure. Remove the tape about 30 minutes after the last coat and trim the paint edge with a sharp razor blade if it bridged onto the tape. For a shower-specific walkthrough, see our guide to painting a shower drain cover.
Step 7: Let the Paint Cure, Then Reinstall the Drain
Leave the painted drain to cure for the full time on the paint label before it touches water. Drying to the touch is not the same as curing, and an uncured finish scratches and peels in the first week. Epoxy products often need several days.
When you reinstall, press a thin rope of plumber’s putty under the flange, seat the drain, and tighten the nut from below. Wipe off squeezed-out putty with a soft cloth so it does not mark the paint.
Common Problems With a Painted Sink Drain and How to Fix Them
Most failures come from skipped prep. The table lists what goes wrong and how to repair it.
| Problem | Likely Cause | Solution |
|---|---|---|
| Paint peels in sheets | No primer or oily surface | Strip the paint, degrease, sand, and repeat with primer |
| Paint bubbles | Solvent or water left on the metal | Let the part dry fully, sand smooth, and recoat |
| Paint chips around the stopper | Daily friction from the stopper | Touch up with thin coats or replace the stopper |
| Drain leaks after reinstalling | Paint or putty missing on the seal | Remove the drain, clean the seal area, and apply fresh putty |
| Drips and runs | Coats applied too thick | Sand the runs flat once dry and apply a lighter coat |
Frequently Asked Questions About Painting a Sink Drain
Yes, but the result is less durable. You tape the sink surface and the opening, then sand, prime, and paint the flange where it sits. Tape lines and missed edges are common, so remove the drain whenever possible.
A water-resistant enamel or epoxy spray paint made for metal works best. Pair it with a metal primer, and confirm the label allows indoor use. Chrome-effect sprays also need to be rated for kitchen use, meaning water-resistant and durable. (Hunker)
It lasts from several months to a few years, depending on prep, paint quality, and how often the stopper rubs the flange. A drain with a stopper in daily use wears faster than a fixed strainer. Touch-ups are normal.
Cured paint handles normal water, but harsh abrasive cleaners wear it down. Clean the drain with a soft cloth and mild soap. Check the paint label for chemical resistance before using stronger cleaners.
Replace it if the metal is cracked, pitted, or leaking. Painting only changes the surface, and it cannot repair damage or a failed seal. A new drain kit in the right finish costs little and takes about the same time as painting.
Sand lightly, prime with metal primer, and finish with a bronze-colored metal paint in thin coats. Cure it fully before use. Expect to touch it up over time, since this finish wears where the stopper moves.
Final Verdict
Painting a sink drain works as a low-cost cosmetic fix when you remove the drain, degrease and sand it, prime it, and apply thin coats of water-resistant metal paint. Keep paint off the threads and seals, and give it the full cure time. If the drain is damaged, buy a new one.
References
- Hunker, “How To Paint A Kitchen Sink”: https://www.hunker.com/12200331/how-to-paint-a-kitchen-sink/
- Hunker, “Can You Use Chrome Paint On A Sink Drain?”: https://www.hunker.com/12607459/can-you-use-chrome-paint-on-a-sink-drain/
- Hometalk, “Repair Oil Rubbed Bronze Sink Drains”: https://www.hometalk.com/diy/repair/plumbing/q-repair-oil-rubbed-bronze-sink-drains-29649433



Leave a Reply